
By Sarah Johnson
I still remember the first time I saw a blooming potato. It was at a friend’s backyard barbecue, and she pulled this fanned-out, golden-brown masterpiece from her air fryer like she’d just performed a magic trick. Everyone crowded around the basket. The potato looked like a little edible flower, all those crispy edges catching the afternoon light, and I remember thinking, there’s no way I can make that on a Tuesday night.
Turns out, I was wrong. Dead wrong.
Here’s the thing about blooming potatoes—sometimes called Hasselback potatoes with a serious upgrade—they look fancy, but the technique is shockingly forgiving. You slice a potato in a grid pattern, stopping just short of the bottom, and let the heat do the rest. The slices fan open as they cook, creating dozens of crispy, seasoned surfaces while the interior stays fluffy and tender .
The air fryer is genuinely the perfect vehicle for this. Unlike a traditional oven, which can dry out the exterior before the center softens, the air fryer’s intense circulating heat crisps the outside while keeping the inside pillowy . And because you’re not deep-frying anything, it stays firmly in weeknight-dinner territory.
A quick note on the name: “blooming potato” isn’t a heritage variety or a regional tradition with centuries of lore. It’s a modern home-cooking invention, a riff on the Hasselback technique that likely got its start in Swedish kitchens (Hasselbackspotatis dates back to the 1940s) and evolved into this cross-hatched, flower-like version as home cooks started sharing their tricks online . The Idaho Potato Commission even has a whole page dedicated to the “blossoming” method, though they focus on baked potatoes rather than the air fryer route . What matters is that this is a technique, not a rigid recipe. Once you get the cutting down, you can season these however you like.
I’ve made these probably a dozen times now, and I’ll be honest: I still cut through the base on occasion. It happens. The potato still tastes great—it just looks more like a fan than a flower. The fix is simple: lay a pair of chopsticks or wooden spoons on either side of the potato as a stopper for your knife . That little guardrail makes all the difference.
What I love most about this recipe is how it transforms a humble, dirt-cheap ingredient into something that feels celebratory. Potatoes deserve more credit. They’re forgiving, filling, and they take on flavor like a sponge. This version leans on garlic powder, dried thyme, and rosemary—nothing fancy—but the exposed surfaces get so crispy and savory that people will assume you fussed.
So here’s the deal: about 25 minutes of your time, a few pantry staples, and one air fryer. That’s it.
Ingredients:
This recipe makes 4 blooming potatoes as a side dish, or 2 generous main-course portions if you’re loading them up with toppings.
The Potatoes:
- 4 medium Russet or Yukon Gold potatoes (about 6–8 ounces / 170–225 g each). Russets give you the fluffiest interior and the crispiest skin. Yukon Golds are creamier and slightly richer. Both work beautifully. Avoid tiny new potatoes—they’re too small to slice into a proper bloom—and avoid enormous baking potatoes, which take too long to cook through in the air fryer .
- 1½ tablespoons olive oil (22 ml) or melted butter (21 g). Butter browns faster and brings a nutty flavor; olive oil is more forgiving if you’re distracted. I usually use olive oil for weeknights and butter when I want the kitchen to smell like a holiday.
- ¾ teaspoon kosher salt (4.5 g), plus more for finishing
- ½ teaspoon freshly ground black pepper (1 g)
- ½ teaspoon garlic powder (1.5 g)
- ¼ teaspoon dried thyme (0.5 g)
- ¼ teaspoon dried rosemary (0.5 g), lightly crushed between your fingers
- 1 tablespoon fresh parsley (about 4 g), finely chopped, for garnish
Optional Toppings (pick your adventure):
- Sour cream and chives
- Shredded sharp cheddar (add in the last 2 minutes of cooking so it melts without burning)
- Crumbled bacon
- A drizzle of melted butter
- Grated Parmesan and a pinch of smoked paprika
Substitution Notes (tested, not guessed):
- No fresh parsley? Skip it. The potatoes are still excellent. Dried parsley tends to taste like lawn clippings, so I’d rather you leave it out entirely.
- Dried herbs are flexible. If you only have oregano or Italian seasoning, use ½ teaspoon of that instead of the thyme and rosemary. The flavor shifts but the technique holds.
- Vegan version: Use olive oil instead of butter, and skip the dairy toppings. Everything else is naturally plant-based.
- Gluten-free: This recipe is already gluten-free as written. Just double-check your bacon and any packaged toppings if you’re sensitive.
- Halal/kosher: Use olive oil and skip the bacon. The base recipe is compliant; toppings are where you need to pay attention.
A quick ingredient spotlight: Yukon Gold potatoes are my quiet favorite here. They have a naturally buttery, almost yellow flesh that stays creamy even when the exterior gets aggressively crispy. Russets are the classic choice for baked potatoes, and they’re fantastic, but Yukon Golds bring a little extra richness that I think makes these feel more special . If you can find medium-sized ones—roughly the size of your fist—grab those.
What to Serve With
Blooming potatoes are versatile enough to sit alongside almost anything, but they really shine when paired with something that contrasts their crispy, salty richness. Here’s how I like to build a plate around them:
1. Grilled or roasted chicken. A simple herb-roasted chicken or even store-bought rotisserie chicken works. The potatoes soak up any juices on the plate, and the crispy edges play nicely against tender meat.
2. A sharp, vinegar-based slaw. Think apple cider vinegar, shredded cabbage, and a little Dijon. The acidity cuts through the richness of the oil and any cheesy toppings. It’s the kind of side that makes the whole meal feel balanced.
3. Steak (especially a flank or skirt). Slice the steak thin, pile it next to a blooming potato, and let the meat juices mingle with the crispy potato edges. This is a weekend dinner that feels like a steakhouse plate without the steakhouse bill.
4. A simple green salad with lemon vinaigrette. If you’re keeping things light, a lemony salad is the move. The brightness wakes up your palate between bites of crispy, savory potato.
5. Air fryer poached egg (for brunch). Crack an egg into a small ramekin, air fry it alongside the potato for the last few minutes, and slide it on top. The runny yolk becomes a sauce . This is my favorite weekend breakfast situation.
6. A creamy dipping sauce. Mix equal parts sour cream and mayonnaise with a squeeze of lemon, a pinch of garlic powder, and a dash of hot sauce. Serve it on the side for dunking the individual potato “petals.” This is essential if you’re serving these as an appetizer .
Beverage suggestion: A crisp, dry hard cider or a cold pilsner. The carbonation and slight bitterness refresh your palate between bites of crispy, salty potato. If you’re going non-alcoholic, a sparkling water with a squeeze of lime does the same job.
Step-by-Step Cooking Process
Step 1: Prep the Potatoes
Image Prompt: Raw russet and Yukon Gold potatoes scattered on a rustic wooden cutting board, a sharp chef’s knife and a pair of wooden chopsticks resting nearby, natural window light casting soft shadows, a few sprigs of fresh rosemary in the corner.
Scrub the potatoes thoroughly under cold running water. Don’t skip this—potato skin can hold onto grit, and you’re eating the skin here. Pat them completely dry with a clean kitchen towel. Moisture is the enemy of crispiness, so take a minute to get them properly dry.
Leave the skins on. They’re part of the charm, and they crisp up beautifully.
Step 2: The Cutting Technique (This Is the Whole Ballgame)
Image Prompt: Close-up shot of hands slicing a potato in a crosshatch pattern, the knife resting against a wooden chopstick guide, the potato’s grid pattern clearly visible, flour sack towel underneath, warm kitchen lighting.
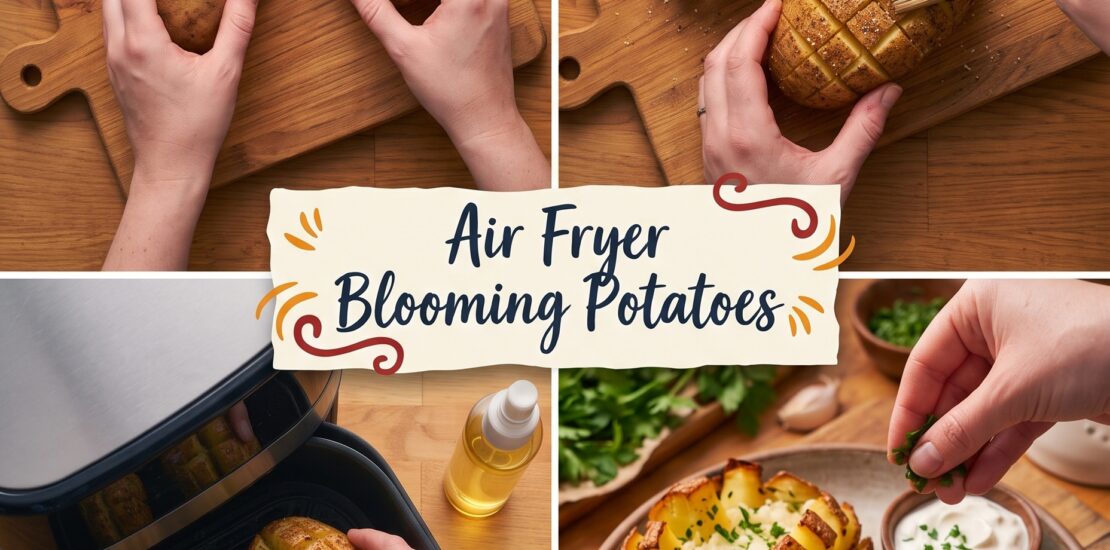
Place one potato on your cutting board. Lay two chopsticks (or the handles of two wooden spoons) flat on the board, one on each side of the potato, running parallel to it. These are your stoppers—they’ll prevent your knife from going all the way through .
Using a sharp chef’s knife, make thin slices crosswise down the length of the potato, spacing them about ⅛ to ¼ inch (3–6 mm) apart. The knife should stop when it hits the chopsticks. Then rotate the potato 90 degrees and repeat the process, creating a crosshatch grid. The base of the potato should remain completely intact—this is what holds the whole thing together .
Pro technique: Don’t press hard. Let the knife’s weight do the work. If you’re sawing aggressively, you’re more likely to slip and cut through the base. Slow, deliberate strokes. And if you do accidentally slice through a section? Don’t panic. Push the pieces back together. It’ll still cook and taste fine, even if it fans out a little less dramatically.
Step 3: The Microwave Step (Do Not Skip This)
Image Prompt: Two sliced potatoes sitting in a shallow microwave-safe dish, covered loosely with a vented lid, a microwave in the background, a small bowl of olive oil and a pastry brush in the foreground.
This is the step people want to skip. Please don’t.
Place the cut potatoes in a microwave-safe dish and microwave on high for 5 to 7 minutes, until they’re slightly softened but still firm enough to hold their shape . The microwave par-cooks the interior so that the air fryer can focus on crisping the exterior. Without this step, the outside will brown beautifully while the inside stays raw and crunchy. I’ve tested this out of impatience, and the results were genuinely unpleasant—raw potato centers with burnt edges .
Carefully remove the dish from the microwave. The potatoes will be hot and slightly steamy.
Step 4: Season and Load the Air Fryer
Image Prompt: A hand using a pastry brush to paint olive oil onto a blooming potato, the oil dripping down into the cuts, a small bowl of seasoning mix nearby, air fryer basket visible in the background.
Preheat your air fryer to 390°F (195°C) for about 3 minutes.
While it heats, brush each potato generously with olive oil or melted butter. Work the brush down into the cuts so the fat gets between the layers, not just on top. This is what makes the interior slices savory and crisp rather than bland and steamed.
Sprinkle the salt, pepper, garlic powder, thyme, and rosemary evenly over all sides of the potatoes, again pushing some of the seasoning into the cuts with your fingers or the brush .
Place the potatoes in the air fryer basket, cut-side up, leaving a little space between them. Don’t crowd the basket—if your air fryer is small, cook them in two batches. Overcrowding traps steam and turns crispy potatoes soggy .
Step 5: Air Fry and Finish
Image Prompt: Golden-brown blooming potatoes in an air fryer basket, the slices fanned open and crispy at the edges, a pair of tongs lifting one out, modern kitchen counter with a bowl of chopped parsley and sour cream nearby.
Cook at 390°F (195°C) for 10 to 12 minutes, until the potatoes are deeply golden at the edges and fork-tender in the center . The exact time depends on your air fryer model and the size of your potatoes—start checking at 10 minutes.
If you’re adding shredded cheese, pull the basket out with about 2 minutes left and sprinkle it over the potatoes, then slide it back in to melt .
Transfer to a serving plate, scatter with fresh parsley, and add any cool toppings—sour cream, chives, bacon—right before serving. The contrast of hot, crispy potato and cold sour cream is one of the small joys of home cooking.
Storage note: These are best eaten immediately. Leftovers keep in an airtight container in the fridge for up to 3 days, but they lose their crisp. Reheat at 375°F for about 5 minutes to bring back a little crunch . Freezing isn’t worth it—the texture goes mealy.
A Final Kitchen Note
The first time you make these, you might feel a little clumsy with the knife. That’s normal. The second time, you’ll have the chopstick trick figured out. By the third time, you’ll be making them on a random Wednesday because they’re just that easy once the technique clicks.
And if one potato comes out looking a little less like a flower and a little more like a confused fan? Serve it to yourself. You’ve earned it.


