

By Sarah Johnson
Let me tell you something about onion strings that nobody really talks about: they are the great equalizer of the snack world. You can put a plate of these golden, tangled, salty little ribbons in front of a room full of people—fancy dinner party, game day crowd, picky toddlers, skeptical teenagers—and watch every single person reach for them. There’s no pretense. Nobody asks if they’re healthy. They just disappear.
I started making onion strings in the air fryer a few years back out of pure frustration. The deep-fried version? Delicious, obviously. But standing over a pot of hot oil on a Tuesday night, smelling like a fast-food kitchen for the next two days, dodging grease splatters while trying to keep the batter from sliding off the onions—it lost its charm fast. The air fryer changed the math. It’s not exactly the same as a dive bar onion straw, but honestly? It’s close enough that I stopped missing the oil bath.
Here’s the thing about this particular recipe, though. I’ve tested a lot of air fryer onion strings, and most of them come out either soggy, or bland, or so fragile they shatter before they hit the plate. The trick I landed on involves a two-part coating—flour for adhesion, cornstarch for that shattery crunch—plus a tiny bit of oil tossed directly into the dry mix. That little step is the difference between “meh, they’re fine” and “wait, these came out of an air fryer?”
Also, a quick bit of context if you’re curious: onion strings—sometimes called onion straws, tanglers, or French fried onions—have been around in American bar food culture for decades, but they’re actually cousins to a much older global tradition. Think Indian birista (crispy fried onions used in biryanis and curries), Middle Eastern fried shallots, or the crispy onion garnish on a proper bowl of Japanese ramen. Every culture that grows onions has figured out that frying them until they’re golden and crunchy makes everything better. The air fryer just makes it easier to do on a weeknight without heating up half a gallon of canola.
So here we are. Thin-sliced sweet onions, a punchy seasoned coating, a hot air fryer, and about twenty minutes of your time. Let’s make the thing that everyone will fight over.
Ingredients
This makes enough for 4 to 6 people as a side or topping, or roughly 3 people if they’re standing at the counter eating them straight off the paper towel like my family does.
The Onions:
- 2 large sweet onions (about 1.5 lbs / 680 g total)—Vidalia, Walla Walla, or Maui if you can find them. Yellow onions work fine too, but sweet onions have a higher sugar content that caramelizes beautifully in the air fryer and a milder bite.
- 1 tablespoon olive oil or avocado oil—plus a little extra spray oil for the basket.
The Coating:
- ½ cup all-purpose flour (60 g)
- 2 tablespoons cornstarch (15 g)—do not skip this. It’s the secret to the crunch.
- 1 teaspoon smoked paprika (or regular paprika if that’s what you have)
- 1 teaspoon garlic powder
- ½ teaspoon onion powder
- ½ teaspoon fine sea salt—plus more for finishing
- ¼ teaspoon freshly cracked black pepper
- Pinch of cayenne pepper (optional, but it wakes everything up)
For Serving:
- Flaky sea salt for finishing
- Dipping sauce of choice (more on that below)
A quick word on substitutions, because I know you’re going to ask:
Gluten-free? Swap the all-purpose flour for a 1:1 gluten-free blend (Bob’s Red Mill works well) and keep the cornstarch. The texture is slightly more delicate but still solid. Don’t use straight almond flour—it burns before the onion gets crispy .
Dairy-free? This recipe is already dairy-free as written. No buttermilk soak required. The oil-and-dry-coating method means you don’t need any dairy at all.
No cornstarch? You can use potato starch or arrowroot powder in its place. Cornstarch is cheapest and easiest, though.
Onion variety note: I tested this with red onions once. They work, but the color bleeds a little into the coating and the flavor is sharper. Sweet onions are the move here.
What to Serve With
Onion strings are flexible in a way that few foods are. They’re a topping, a side, a snack, a garnish, and a desperate 4 p.m. “I need something crunchy immediately” situation. Here’s how I actually serve them:
1. Smash Burgers (or Any Burger, Really)
This is the classic. Pile a generous handful directly onto a burger with melty American cheese and a swipe of mustard-mayo. The strings stay crisp enough to give you that textural contrast against the soft bun and juicy patty. If you’re doing a BBQ burger with pulled pork, even better .
2. Green Bean Casserole (The Holiday Move)
Those canned fried onions? These are better. Make a batch, let them cool completely, and scatter them over the top of a green bean casserole right before serving. They’re lighter, fresher-tasting, and you get to say you made them from scratch .
3. Steak Night
A grilled ribeye or strip steak with a tangle of crispy onion strings on top is a steakhouse move you can pull off at home. The sweetness of the onions plays off the char of the beef .
4. A Big Crunchy Salad
This is the underrated one. Romaine, cherry tomatoes, cucumber, maybe some roasted squash or pomegranate seeds if you’re feeling autumnal, and a handful of onion strings crumbled over the top instead of croutons. They add salt and crunch without the heaviness of bread .
5. Chili and Sliders
A bowl of chili with a pile of these on top is a whole meal. Same goes for sliders—especially pulled pork or BBQ chicken .
6. Just a Bowl of Dip
Ranch, garlic aioli, spicy mayo, BBQ ranch, or a simple sour cream-and-chive situation. The dip is almost an excuse. Almost.
Beverage pairing: For a crisp, cold non-alcoholic option, a dry hard cider or a light lager works beautifully with the sweetness of the onions. If you’re keeping it NA, a sparkling water with a squeeze of lime does the job—the acid cuts through the fried richness.
Step-by-Step Cooking Process
Step 1: Slice the Onions (Thinly. No, Thinner.)
Peel both onions and cut off the root and tip ends. Now slice them as thinly as you possibly can—aim for about ⅛-inch thick. A mandoline is ideal here if you have one, but a sharp chef’s knife and a little patience works fine too. The thinner the slice, the crispier the final result. Thick slices steam instead of crisp, and nobody wants that.
Separate the slices into individual rings and strands with your fingers. Don’t worry if some pieces are longer and some are shorter—that’s the charm of onion “strings.” Transfer them to a large bowl.
A quick kitchen moment: If your onions are particularly pungent and making your eyes water, rinse the sliced rings in cold water for a minute and pat them very dry. It won’t eliminate the sting entirely, but it takes the edge off. Also, a sharp knife matters more than any trick. A dull blade crushes the onion cells and releases more of that sulfur compound that makes you cry.
Step 2: Make the Seasoned Coating and Toss
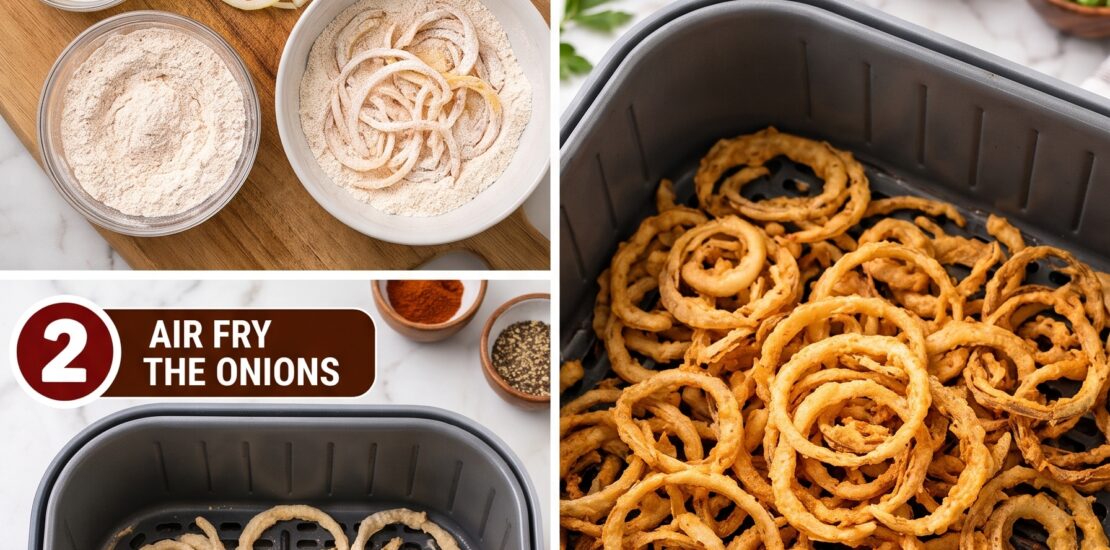
In a large bowl, whisk together the flour, cornstarch, smoked paprika, garlic powder, onion powder, salt, black pepper, and cayenne if using. Give it a good stir so everything is evenly distributed—you don’t want a pocket of cayenne hiding in there.
Now, here’s the step that makes this recipe different from most air fryer onion string recipes you’ll find: drizzle the 1 tablespoon of olive oil directly over the dry coating mixture and stir it in with a fork. The mixture should look a little crumbly, like damp sand. This is exactly what you want.
Add the sliced onions to the bowl and toss everything together with your hands. Get in there. Make sure every single strand gets coated. The oil in the coating helps the flour stick to the onions and helps them brown in the air fryer without needing a heavy spray. It’s a small step with a big payoff.
Step 3: Load the Air Fryer (Without Crowding It)
Preheat your air fryer to 375°F (190°C) for about 3 minutes. This matters. A cold basket means soggy onions.
Lightly spray the basket with oil—just a quick mist, not a drench. Now grab a handful of the coated onions and shake off any excess flour back into the bowl. Arrange them in the basket in a single, loose layer. They can touch and tangle a little—they’re strings, after all—but don’t pack them in. If you overcrowd the basket, the air can’t circulate, and you’ll end up with steamed onions instead of crispy ones. Work in batches. I know it’s annoying. Do it anyway.
Depending on the size of your air fryer, you’ll probably get 2 to 3 batches out of this recipe.
Step 4: Air Fry and Shake (and Watch Closely)
Cook at 375°F (190°C) for 10 to 14 minutes total, shaking the basket every 4 to 5 minutes. The shaking is non-negotiable—it prevents the onions from sticking together in clumps and helps them brown evenly.
Here’s the pro technique that saves batches: start checking at the 8-minute mark. Thin onion slices go from “almost there” to “burnt and bitter” in about 90 seconds. You want them deeply golden brown with some darker edges. Pull one out and taste it. If it’s crispy and sweet, you’re done. If it’s still a little soft in the center, give it another 2 minutes.
When they’re done, transfer them to a plate lined with paper towels and sprinkle immediately with a pinch of flaky sea salt. Let them cool for 3 to 5 minutes before eating. This feels like torture, but it’s important—they continue crisping as they cool. Trust the process.
Step 5: Serve Immediately (or Store Smart)
Onion strings are at their absolute best within the first 15 minutes after cooking. That’s just the reality. They’re still good later, but the magic fades. If you need to hold them, keep them in a 200°F oven on a wire rack—not stacked on a plate, where they’ll steam themselves soft.
For storage: let them cool completely, then keep them in an airtight container at room temperature for up to 2 days. Re-crisp them in the air fryer at 350°F for 2 to 3 minutes. Don’t microwave them. Please. I’ve seen people do it. The result is tragic .
Step 6: The Lifestyle Moment
Look, I’m not going to stage a fake family gathering for a photo. But here’s what actually happens in my house: I make a double batch, put the first batch on a plate, and by the time the second batch comes out of the air fryer, the first plate is empty. My kid, who claims to hate onions, eats them like French fries. My partner, who is generally a polite person, has been known to hover near the air fryer with a “just checking if they’re done” energy that fools no one.
These onion strings are that kind of food. They don’t need a fancy presentation. They need a plate, maybe some dip, and people nearby who you like enough to share with. Or don’t share. I’m not here to judge.
A Few Final Notes from My Kitchen to Yours
The biggest mistake people make with air fryer onion strings is slicing the onions too thick and overcrowding the basket. Those two things account for about 90% of soggy onion complaints. Thin slices. Loose layers. Shake the basket. You’ll be fine.
On the oil: I know it seems counterintuitive to add oil to a recipe that’s supposed to be “healthier” than deep frying. But a single tablespoon distributed across all the onions is nothing compared to the cup or two of oil that goes into a traditional fryer. And that tiny bit of oil is what helps the coating actually crisp and brown instead of staying pale and powdery.
Make extra. I’m serious. Double the recipe. You’ll thank me.
Now go preheat that air fryer. The onions are waiting.
Sarah Johnson is a home cook, recipe tester, and unabashed onion enthusiast based in the Midwest. She believes the air fryer is the best thing to happen to weeknight cooking since the sheet pan, and she will fight you on that.


