

By Sarah Johnson
Air fryers have quickly become one of the most useful appliances in modern kitchens. Whether you’re preparing crispy chicken, golden French fries, roasted vegetables, or a quick afternoon snack, an air fryer can make everyday cooking easier and more enjoyable. It uses rapidly circulating hot air to cook food, creating a deliciously crisp exterior without requiring the large amount of oil typically used in deep frying. But here’s something many home cooks discover after bringing their new appliance home: owning an air fryer doesn’t automatically mean every meal will turn out perfectly.
Have you ever opened your air fryer basket expecting beautifully golden fries, only to find a disappointing mixture of soft, unevenly cooked potatoes? Or perhaps you’ve prepared chicken that looked delicious on the outside but wasn’t quite cooked through in the middle. These frustrating kitchen moments often happen because of a few common mistakes. The good news is that most of them are easy to fix once you understand how your appliance works.
I still think one of the biggest misconceptions about air fryers is that they’re completely foolproof. They’re convenient, certainly, but they have their own cooking rules. A little overcrowding, too much oil, or the wrong temperature can change the final result dramatically. Learning these simple lessons can help you save ingredients, avoid unnecessary energy use, and get much better results from your favorite recipes.
In this guide, we’ll explore the 10 costly mistakes to avoid with your air fryer, from overfilling the basket to neglecting regular cleaning. You’ll also discover practical cooking techniques, useful ingredient substitutions, serving suggestions, and helpful tips for making your air fryer work more efficiently.
Whether you’re a beginner or someone who already uses an air fryer several times a week, these tips can make a real difference in your kitchen.
Ingredients
This isn’t a traditional recipe with a fixed list of ingredients. Instead, we’re using a simple batch of seasoned air fryer chicken as a practical example to demonstrate the techniques discussed throughout this guide.
Ingredients for the Example Air Fryer Chicken
Prep time: 10 minutes · Cook time: approximately 18–25 minutes · Servings: 4
| Ingredient | US Measurement | Metric |
|---|---|---|
| Boneless chicken thighs | 1.5 lb | 680 g |
| Olive oil | 1 tbsp | 15 ml |
| Garlic powder | 1 tsp | 3 g |
| Paprika | 1 tsp | 2 g |
| Onion powder | 1 tsp | 2 g |
| Salt | ½ tsp | 3 g |
| Black pepper | ¼ tsp | 1 g |
| Dried oregano | ½ tsp | 1 g |
| Lemon juice | 1 tbsp | 15 ml |
Ingredient Spotlight: Choosing the Right Oil
Olive oil is a convenient choice for this example because it adds flavor and helps seasonings adhere to the chicken. You can also use avocado oil or another cooking oil suitable for the temperature you’re using.
A common mistake is assuming that more oil automatically means crispier food. In an air fryer, a thin coating is usually enough. Too much oil can make food greasy and may collect in the bottom of the basket.
For a lighter option, use a small amount of oil spray. Choose a spray suitable for your appliance’s nonstick coating, and always follow the manufacturer’s instructions.
Realistic Ingredient Substitutions
Chicken thighs: Substitute boneless chicken breast, adjusting cooking time for thickness.
Olive oil: Use avocado oil or another suitable cooking oil.
Paprika: Smoked paprika adds a deeper flavor, while mild paprika keeps the seasoning gentle.
Oregano: Thyme or Italian seasoning works well.
Lemon juice: A little vinegar can provide a similar tang.
Fresh garlic: Replace garlic powder with finely minced garlic, but avoid using excessive amounts that could burn.
For a vegetarian alternative, try firm tofu or cauliflower florets with the same seasoning blend. For a gluten-free meal, check that any packaged seasonings are certified or labelled gluten-free when needed. The ingredients listed above are naturally gluten-free in their plain forms.
What to Serve With
Air fryer chicken is wonderfully versatile. Its crisp, seasoned exterior pairs well with fresh salads, roasted vegetables, creamy sauces, and simple carbohydrate-rich sides. You don’t need to prepare an elaborate meal to make dinner feel special.
7 Here are seven delicious pairing ideas:
1. Crispy Air Fryer Potato Wedges
Potato wedges are a classic companion to seasoned chicken. Their crisp edges and soft centers create a satisfying contrast. Season them with paprika, garlic powder, and a little olive oil. Cook them in a separate batch to avoid overcrowding.
2. Fresh Cucumber and Tomato Salad
A refreshing salad brings balance to a warm, savory meal. Combine chopped cucumbers, ripe tomatoes, red onion, parsley, lemon juice, and olive oil. The freshness helps brighten the flavors of the chicken.
3. Garlic Green Beans
Green beans make a simple, colorful side dish. Toss them with a little olive oil and garlic, then air fry until tender with lightly browned edges. Keep an eye on them because thinner beans cook quickly.
4. Fluffy Rice or Quinoa
Rice or quinoa provides a simple base for the chicken. Add fresh herbs, lemon zest, or a little vegetable stock while cooking to enhance the flavor.
5. Creamy Garlic Yogurt Sauce
Mix plain Greek yogurt with minced garlic, lemon juice, chopped parsley, and a pinch of salt. This cool, creamy sauce is excellent for dipping chicken or drizzling over a plate.
6. Homemade Coleslaw
A crunchy cabbage and carrot slaw adds texture and freshness. You can use a creamy dressing or a lighter lemon-vinegar version depending on your preference.
7. A Refreshing Beverage
Serve the meal with chilled lemon water, homemade iced tea, or sparkling water with fresh mint. A citrus-based drink complements the paprika and garlic seasoning beautifully.
These pairings are easy to adapt for family meals, casual lunches, or weekend dinners. You can also prepare several of the sides ahead of time, making the final cooking process less stressful.
Step-by-Step Cooking Process
Before we get into the ten mistakes, let’s walk through a simple air fryer chicken preparation. This recipe gives us a practical way to see how small adjustments can improve texture, flavor, and cooking consistency.
Step 1: Prepare the Ingredients Properly
Make sure the seasoning is distributed evenly over every piece. You don’t need to drown the chicken in oil; a light coating is enough. If you’re using a marinade, avoid leaving large pools of liquid in the bowl when transferring the chicken to the basket. The goal is to season the food without creating unnecessary moisture.
Step 2: Mix the Seasonings
Let the chicken rest for approximately 5–10 minutes while you prepare the appliance. This brief resting period allows the seasoning to settle onto the surface. If you prefer a stronger marinade flavor, you can refrigerate the chicken for longer, keeping food safety in mind.
Step 3: Arrange the Chicken in the Air Fryer
Place the chicken thighs in the basket in a single layer where possible. Leave a little room between the pieces so hot air can circulate. Avoid stacking them on top of one another.
For this example, begin at approximately 190°C (375°F), adjusting the temperature to suit your appliance and the thickness of the chicken. The exact cooking time will vary, so don’t rely solely on the timer.
Step 4: Cook, Turn, and Check
The most important part of cooking chicken is checking that it has reached a safe internal temperature. Use a food thermometer inserted into the thickest part of the meat. Poultry should reach 74°C (165°F). If it hasn’t reached that temperature, continue cooking and check again.
Step 5: Plate and Serve
The result should be flavorful, juicy chicken with a nicely browned exterior. If the first batch isn’t quite as crispy as you’d hoped, don’t worry. The following mistakes explain exactly what to adjust next time.
The 10 Costly Mistakes to Avoid With Your Air Fryer
Mistake 1: Overcrowding the Air Fryer Basket
One of the most common air fryer mistakes is trying to cook too much food at once. It’s understandable. When you’re hungry or preparing dinner for several people, filling the basket to its maximum capacity seems like the fastest solution. Unfortunately, overcrowding can prevent hot air from circulating properly around the ingredients. Instead of becoming crisp and golden, food may turn soft, pale, or unevenly cooked.
Air fryers work by circulating hot air around the food. When ingredients are piled too tightly, the airflow becomes restricted. This is particularly noticeable with French fries, chicken nuggets, potato wedges, and vegetables. Some pieces may brown beautifully while others remain disappointingly soft.
The better approach is to arrange food in a loose single layer whenever possible. If you’re cooking a large quantity, prepare it in batches. Yes, it may take a little longer, but the improvement in texture is worth it. You can keep the first batch warm in an oven set to a low temperature, provided you do so safely and avoid letting it dry out.
Pro tip: If your fries aren’t crispy, try reducing the amount in the basket before increasing the temperature.
Mistake 2: Using Too Much Oil
An air fryer is designed to cook food using circulating hot air, not a deep pool of oil. Adding too much oil can create greasy results, unwanted smoke, and a mess inside the appliance. It can also make some foods less crisp than expected.
A light coating of oil is often enough to help vegetables and homemade potato wedges brown nicely. Foods that already contain fat, such as skin-on chicken or certain frozen products, may need little or no additional oil.
Choose a cooking oil appropriate for the temperature you’re using. Measure it rather than pouring directly from the bottle. For many recipes, one or two teaspoons can be sufficient, depending on the quantity of food.
Another detail worth remembering is that cooking sprays aren’t all suitable for every air fryer basket. Some aerosol sprays can damage certain nonstick coatings over time. Check the appliance manual and use an appropriate oil applicator if needed.
Pro tip: Toss the ingredients with a small amount of oil in a bowl before placing them in the basket.
Mistake 3: Ignoring Preheating Instructions
Starting with a hot cooking chamber can help certain foods brown more evenly from the beginning. This is especially useful for foods where crispness is important. However, preheating isn’t a universal rule, and unnecessary preheating may waste energy.
Always consult the instructions for your specific model. If a recipe recommends preheating, follow that guidance. If your appliance has a dedicated preheat function, use it as intended.
Pro tip: Don’t automatically copy the preheating time from another air fryer recipe. Different models may have different heating characteristics.
Mistake 4: Forgetting to Shake or Flip the Food
Shaking the basket or turning the food halfway through helps expose different surfaces to the circulating air. It also allows you to check whether ingredients are cooking faster than expected.
For small foods, a gentle shake is usually enough. For larger items, such as chicken thighs or fish fillets, use suitable kitchen tongs to turn them carefully. Avoid scratching the basket with metal tools if it has a nonstick coating.
Pro tip: Set a halfway reminder when following a new recipe. Once you understand your air fryer, you’ll become more comfortable judging when food needs turning.
Mistake 5: Cooking at the Wrong Temperature
Many home cooks assume that the highest temperature is always the best choice for crispy food. That’s not necessarily true. Different ingredients respond differently to heat. Delicate fish, vegetables, frozen snacks, and thick cuts of meat may all require different settings.
When adapting a conventional oven recipe, remember that an air fryer is a compact convection appliance. The cooking time and temperature may need adjustment. Begin with a trusted air fryer recipe and monitor the food closely.
Pro tip: Use a food thermometer for meat and poultry rather than judging doneness by color alone.
Mistake 6: Not Drying Ingredients Before Cooking
This mistake often happens when preparing freshly washed vegetables, potatoes, or marinated foods. Washing ingredients is important, of course, but removing the excess water afterward is just as useful. For potatoes, you can rinse away excess surface starch and then dry the slices thoroughly with a clean kitchen towel.
The same idea applies to vegetables such as zucchini, mushrooms, and eggplant. These ingredients naturally contain a lot of moisture. Cutting them into appropriate sizes and avoiding an overly crowded basket can help prevent soggy results.
When preparing marinated chicken, drain off excess liquid before placing the pieces in the basket. You want enough marinade to add flavor, but not so much that the food becomes wet and steamy.
Pro tip: Dry your ingredients before seasoning them. A dry surface helps oil and seasonings adhere more evenly.
Mistake 7: Using the Wrong Accessories or Blocking Airflow
A liner that covers too much of the basket may restrict airflow. This can result in food cooking unevenly or taking longer than expected. Similarly, a baking dish that’s too large may prevent hot air from moving around the ingredients.
Parchment paper deserves special attention. Never place loose parchment paper inside an air fryer during preheating, when there is no food weighing it down. The circulating air can lift the paper toward the heating element. Use appropriately sized liners only as directed by the manufacturer.
Avoid placing accessories too close to the heating element. If you use a baking dish, ensure that it is oven-safe, fits properly, and doesn’t interfere with the basket or heating components.
Pro tip: Accessories should make cooking easier, not interfere with the appliance’s airflow.
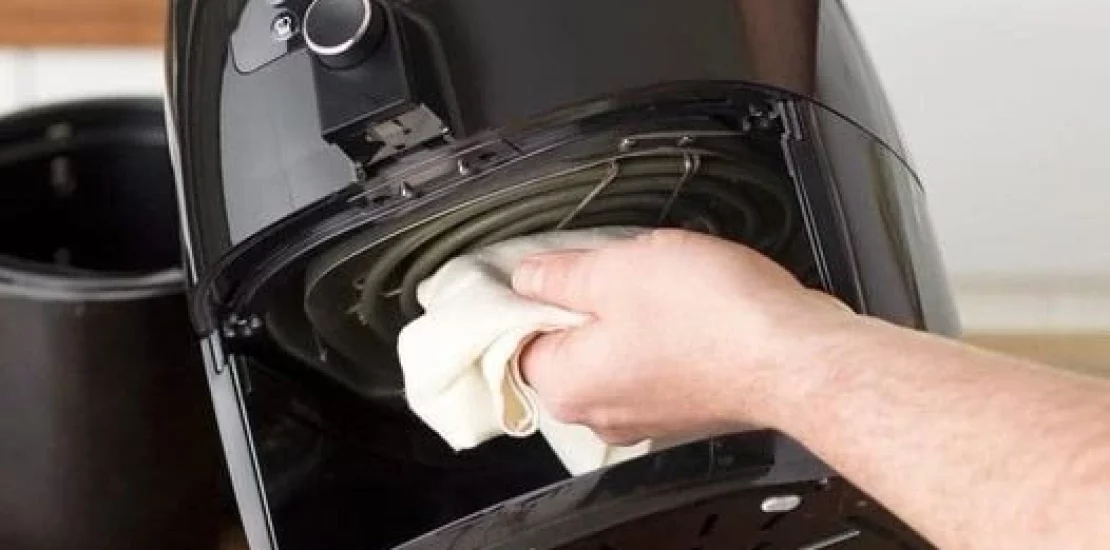
Mistake 8: Neglecting Regular Cleaning
Cleaning may not be the most exciting part of cooking, but it can make a noticeable difference to your air fryer. Grease, crumbs, and leftover food particles can accumulate after repeated use. Over time, these residues may create unpleasant odors, smoke, and unwanted flavors.
Imagine preparing sweet cinnamon apples after cooking garlic chicken. If the basket still contains traces of garlic and grease, your dessert might pick up an unexpected savory aroma. It’s a small detail, but it can spoil an otherwise lovely meal.
After each use, allow the appliance to cool completely and unplug it before cleaning. Wash removable parts with warm, soapy water and a nonabrasive sponge, provided the manufacturer’s instructions allow it. Wipe the interior carefully and remove food residue without damaging the heating element or nonstick surfaces.
Avoid using metal scouring pads, harsh abrasive cleaners, or sharp tools on coated components. These can damage the surface and shorten the useful life of your appliance.
Regular cleaning also helps you identify problems early. If grease continues to build up or smoke appears repeatedly despite cleaning, consult the manufacturer’s troubleshooting guidance.
Pro tip: Make cleaning part of your cooking routine. It’s easier to remove fresh food residue than stubborn, dried-on grease.
Mistake 9: Opening the Basket Too Frequently
Curiosity is understandable when delicious food is cooking. You might want to check the fries after two minutes, inspect the chicken after another minute, and open the drawer again just to make sure everything looks right. However, constantly opening the air fryer can interrupt the cooking process.
Each time you open the drawer, some of the hot air escapes. The appliance then needs to restore its cooking temperature. This can make the overall cooking process less consistent, particularly when you open it repeatedly during a short recipe.
Most air fryers allow you to pause cooking when the basket is removed. Use this feature to shake, turn, or check your food at sensible intervals rather than constantly interrupting the cycle.
For a new recipe, checking halfway through is often a good starting point. Near the end of the cooking time, inspect the food more frequently if necessary. The goal isn’t to avoid checking altogether; it’s to check efficiently.
Pro tip: Follow the recipe’s recommended halfway shake or flip, then perform a final doneness check before serving.
Mistake 10: Treating Every Air Fryer Like the Same Appliance
This final mistake is easy to overlook. You find a recipe online that promises perfectly crispy chicken in 15 minutes, follow every instruction, and end up with a completely different result. What went wrong? Your air fryer may have a different capacity, heating system, fan strength, or cooking configuration.
A compact air fryer doesn’t necessarily cook exactly like a large dual-zone model. Even two appliances with similar capacities can behave differently. Recipe times are helpful starting points, but they’re not universal guarantees.
The best way to understand your appliance is to learn its characteristics gradually. Keep notes about the foods you prepare, the temperatures you use, and how long each batch takes. These observations will help you develop reliable cooking habits.
Always read the user manual, particularly when it comes to temperature limits, accessories, cleaning, and safe placement. Avoid operating the appliance on an unstable surface or in a confined space that restricts ventilation.
If you notice unusual noises, persistent smoke, electrical problems, or a damaged power cord, stop using the appliance and seek appropriate manufacturer support.
Pro tip: Think of online cooking times as a starting point. Your air fryer, food thickness, and batch size all influence the final result.
How to Get Better Results From Your Air Fryer
Avoiding the ten mistakes above is a great start, but a few extra habits can help you become more confident in the kitchen.
Choose the Right Food Size
Cut vegetables and potatoes into reasonably similar sizes. When pieces are uniform, they tend to cook at a more consistent rate. This is particularly useful for homemade fries, roasted carrots, and potato wedges.
Use a Light Coating of Oil When Appropriate
Oil can help food brown and crisp, especially when preparing fresh vegetables or homemade potato snacks. You don’t need to use a lot. A small measured amount is usually sufficient.
Learn When to Shake
Small foods benefit from occasional shaking, while larger pieces may need turning. The type of food matters more than following a rigid rule for every recipe.
Keep an Eye on Cooking Progress
Air fryer cooking times can vary. Use the recipe as a guide, but pay attention to the appearance and doneness of your food. For meat and poultry, use a thermometer.
Clean After Every Cooking Session
Remove crumbs and grease from the basket and tray after each use. Follow your appliance’s cleaning instructions to prevent residue from accumulating.
Make Small Adjustments
If your food is too pale, consider whether it needs a little more time. If it is drying out, the temperature or cooking duration may be too high. If it is soggy, check the basket capacity and surface moisture before changing several settings at once.
These small adjustments can turn an ordinary cooking experience into a much more reliable one.
Conclusion
Your air fryer can become one of the most valuable appliances in your kitchen when you understand how to use it properly. From crispy potato wedges to juicy chicken and delicious roasted vegetables, it offers plenty of opportunities to make everyday meals easier.
The secret isn’t complicated. Avoid overcrowding the basket, use oil thoughtfully, pay attention to temperature, and remember to shake or turn your food when necessary. Keep your appliance clean, choose appropriate accessories, and always follow the instructions for your particular model.
Perhaps the most important lesson is that an air fryer isn’t a magic cooking machine — it’s a tool that rewards a little attention and practice. Even experienced home cooks occasionally make mistakes. What matters is learning from them and adjusting your technique.
The next time you prepare a meal, try applying just two or three of these tips. You may notice a significant improvement in the texture, flavor, and consistency of your food.
With a little patience, your air fryer can help you prepare delicious meals that your family will enjoy again and again.
Frequently Asked Questions (FAQs)
1. What is the most common mistake people make with an air fryer?
Overcrowding the basket is one of the most common mistakes. When too much food is packed into the basket, hot air cannot circulate freely. This can cause uneven cooking and prevent food from becoming crispy. Cooking in smaller batches is usually the best solution.
2. Do you need to preheat an air fryer before cooking?
Not always. Some air fryers benefit from preheating, while others are designed to cook efficiently without it. Follow your appliance’s instructions and the recipe you’re using. Preheating can be useful for certain foods, especially when a crisp exterior is desired.
3. Why does my air fryer food come out soggy?
Soggy food is often caused by overcrowding, excess surface moisture, or insufficient cooking time. Try drying ingredients before cooking, arranging them in a single layer, and shaking or turning them halfway through the process.
4. Can I use aluminum foil or parchment paper in an air fryer?
Some air fryers allow aluminum foil or parchment paper, but the manufacturer’s instructions should always take priority. These materials must not obstruct airflow or come into contact with the heating element. Never use loose parchment paper during preheating without food weighing it down.
5. How often should I clean my air fryer?
The basket and removable cooking components should generally be cleaned after every use. Allow the appliance to cool and unplug it before cleaning. Periodically inspect the interior and heating element area for residue, following the manufacturer’s maintenance instructions.
by Sarah Johnson


