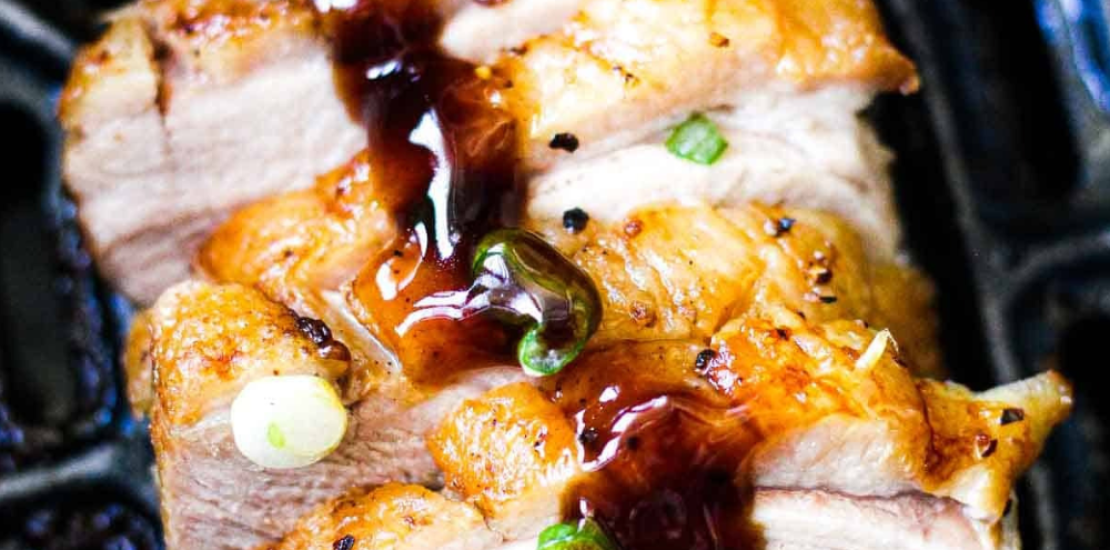
Cooking duck breast in an air fryer might sound unconventional, but this method brings out the best of the duck’s juicy, rich flavor with ease and efficiency. Whether you’re new to cooking duck or a seasoned chef, this air fryer recipe will elevate your meals without the need for specialized techniques or ingredients.
The air fryer’s rapid, hot air circulation is ideal for cooking duck breast, producing a perfectly crisp skin while maintaining the meat’s juicy, tender texture. Air frying also keeps mess to a minimum, especially compared to pan-frying, and cooks the meat in half the time required by traditional methods.
Benefits of Cooking Duck in the Air Fryer
– **Crispy Skin:** An air fryer delivers a reliably crisp skin without needing excess oil.
– **Speed and Convenience:** Duck breast can be ready in under 20 minutes.
– **Less Cleanup:** No splattering oil or need for a stovetop pan.
– **Healthier Option:** Air frying requires minimal added fats.
Ingredients
Essential Ingredients
– 2 duck breasts (around 6-8 ounces each)
– Salt and black pepper, to taste
**Optional Ingredients for Extra Flavor**
– Garlic powder
– Fresh or dried thyme
– Zest of an orange (for a citrusy twist)
– Honey or maple syrup for glazing
**Preparing the Duck Breast**
**How to Score the Duck Skin**
Using a sharp knife, gently score the skin in a crisscross pattern without cutting through to the meat. This allows the fat to render out and contributes to a crispier texture.
**Seasoning Tips for Best Results**
Season generously with salt and pepper. For added depth, rub a small amount of garlic powder, thyme, and orange zest over the skin and flesh. Letting it sit for a few minutes allows flavors to penetrate.
Setting Up the Air Fryer
**Choosing the Right Temperature**
Preheat your air fryer to **400°F (200°C)**. This high heat is essential to achieving a crispy skin.
**Preheating the Air Fryer**
Allowing the air fryer to heat up for about 5 minutes ensures even cooking and helps in achieving the ideal texture on the duck.
Cooking Instructions for Juicy Air Fryer Duck Breast
**Step-by-Step Cooking Guide**
1. **Score and Season:** Start by scoring the duck skin and seasoning both sides.
2. **Arrange in Air Fryer:** Place the duck breasts skin-side down in the air fryer basket.
3. **Cook at 400°F:** Set for 8 minutes for medium-rare or up to 12 minutes for well-done.
4. **Flip and Finish:** Turn the duck breasts over in the last 2 minutes to evenly cook the flesh.
Adjusting Time for Different Levels of Doneness
– **Rare:** 6-7 minutes
– **Medium-Rare:** 8-10 minutes
– **Well-Done:** 11-12 minutes
**How to Achieve Perfectly Crispy Skin**
**Tips for Crispy Skin**
Pat the skin dry thoroughly with a paper towel before scoring. Avoid crowding the air fryer basket, as the duck needs space to cook evenly.
**Common Mistakes to Avoid**
Don’t skip preheating, as this helps prevent sogginess. Avoid over-seasoning with wet ingredients, as they can prevent the skin from crisping up.
**Monitoring Doneness and Internal Temperature**
**Using a Meat Thermometer**
Insert a meat thermometer into the thickest part of the duck breast. For safety and taste:
– **Medium-Rare:** 135°F (57°C)
– **Medium:** 145°F (63°C)
– **Well-Done:** 155°F (68°C)
**Resting the Duck Breast**
**Why Resting is Essential**
Letting the duck rest for about 5-7 minutes redistributes the juices, ensuring each bite is flavorful and tender.
#### **Ideal Resting Times**
Resting for at least 5 minutes keeps the duck breast juicy and delicious.
Serving Suggestions for Air Fryer Duck Breast
#### **Side Dishes That Pair Well**
– **Vegetable Sides:** Roasted Brussels sprouts, asparagus, or glazed carrots.
– **Starches:** Mashed potatoes or wild rice complement the richness of duck.
#### **Garnishing Ideas**
Add fresh herbs like thyme or rosemary, or garnish with a slice of orange for a fresh, zesty touch.
### **Sauce Options for Duck Breast**
#### **Sweet and Savory Sauces**
– **Classic Orange Sauce:** A sweet, tangy addition that complements duck beautifully.
– **Balsamic Reduction:** Adds a robust flavor with a hint of sweetness.
Simple Homemade Sauce Recipes
Combine a tablespoon of honey or maple syrup with balsamic vinegar, adding a bit of orange zest if desired. Reduce over medium heat until slightly thickened.
Tips for Reheating Duck Breast in the Air Fryer
Best Practices for Retaining Juiciness
Set the air fryer to 350°F (175°C) and heat for about 4-5 minutes, or until warmed through. This keeps the skin crisp without drying out the meat.
#### **Avoiding Overcooked Leftovers**
Check frequently when reheating to avoid cooking beyond your desired doneness.
### **Health Benefits of Duck Meat**
#### **Nutritional Profile**
Duck breast is packed with high-quality protein, iron, and zinc, and is relatively low in saturated fats when prepared correctly.
#### **Benefits Compared to Other Poultry**
Duck is rich in vitamin B, particularly B6 and B12, which support energy and metabolism. Its nutrient-dense profile makes it an excellent alternative to chicken or turkey.
Conclusion
Air fryer duck breast is a perfect dish for those seeking a blend of crispiness, juiciness, and full flavors without the hassle of traditional cooking methods. With simple ingredients and a bit of know-how, you can elevate your home-cooked meals in no time. Follow these steps to ensure your duck breast is a flavorful and memorable highlight at the dinner table!
Frequently Asked Questions (FAQs)
**Can You Cook Frozen Duck Breast in an Air Fryer?**
Yes, but allow extra cooking time. Defrosting before air frying will yield better results.
**How Long Should You Marinate Duck Breast?**
A marinade can enhance flavor; 2-4 hours is generally sufficient.
**Can You Cook Duck Breast Without Scoring the Skin?**
Scoring helps to render fat and achieve a crispier skin. It’s recommended but not mandatory.
**How Do You Know When Duck Breast is Done?**
Check with a meat thermometer. For medium-rare, aim for 135°F (57°C).
**Can You Cook Duck Breast with Skinless Options?**
Yes, but the skin adds flavor and moisture. Skinless duck may require a slightly shorter cooking time.

